Showing posts with label lights. Show all posts

Tuesday, February 23, 2010

my Bike BrightZ (flashing LED lights) demo

Here's a video I shot to show the effectiveness of the Bike BrightZ at night. Watch it and judge for yourself.


Just for clarification, I mounted two lights on the bike in the video, one on the left and one on the right of my rear rack, pointed at an angle to the rear. If I was to do this permanently, I think I would have used two of the Bike BrightZ red flashing LEDS rather than a yellow and green as shown in the video.

Bike BrightZ can be ordered online for $19.99 each with free shipping in US and Canada.

Here's what I found from my testing evaluation on adult and kids' bicycles (note: Bike BrightZ provided me with samples for my testing and evaluation - I did not purchase these nor receive compensation for this review)...

PROS:
Fairly easy to install.
Reasonably-priced.
Package comes complete with batteries.
Easy to operate.
Different LED colors available.
Multiple flashing patterns (or steady).
Kids love them - it's easy to get them to use them.

CONS:
The unit can rub against down tubes and scratch paint when grit gets between unit and the bicycle tubes.
Since it mounts low, it could be obscured by mud/muck/sand/grit/grime.
It might not fit flush on more radical designed frames or curvy frames or smaller kids' bikes.

BOTTOM LINE:
I am of the opinion that any visual enhancement in low light or dark conditions, especially as a bicycle commuter, is a good thing. This said, this product would be a good thing to consider in your "visibility toolbox" along with a headlight and flashing rear red LED or reflector (per many states' laws). Additional reflectors and/or lights are also beneficial. I would avoid the colors other than red, and especially not combine the red and blue Bike BrightZ, as to avoid drivers thinking you're posing as a cop.

As for kids' use of this product, there is a coolness factor that they really enjoy which makes it easier to get them to turn them on. (Note: the kids sampling this were 5-7 years-old and were not actually riding in the streets at night).

Thursday, February 11, 2010

follow-up post --> installing Bike Brightz

I recently mentioned I received a package from a company that makes and markets Bike Brightz to have me and my kids install them on our bikes, test out, and review the product.

I installed the lights this week and shot some photos of the process.

Here's a photo of the Bike Brightz packaging. I liked the fact it is easy to open - something rare in this day and age when you find a product that isn't either completely encased in a near bulletproof plastic or boxed up in a styrofoam cocoon.


What's included in the Bike Brightz package... two AAA batteries, two zip ties, a protective rubber "gasket" (to fit between the light and the bike frame to protect the bike paint), and the lighting unit.


Installing onto the downtube of a kids' bike with the supplied zip ties (bike pictured upside down). If you can fasten a zip tie, you can install this light unit. Not pictured was me slipping the batteries into the unit just prior to this shot.


The installed product... turns on with a simple push of a button on the unit. It cycles through steady or multiple speeds of flashing.


Here's another I mounted to the downtube on my Cannondale road bike.


One issue I had with one of the kids' bikes related to the downtube installation location. Since her chainstays (another manufacturer's recommended installation location) were short and/or cluttered with a chain/chainguard, I only really could install the light on the downtube. Her downtube is curved a bit allowing for a gap between the frame and the light unit as in the photo. I am sure I can fashion something a bit thicker to pad the area (like a piece of old/extra thinner helmet padding) and keep the unit from slipping around - however, with the zip ties tightened, it is still pretty secure as-is.


Next and final installment: riding impressions.

Disclaimer: I am not affiliated with Bike Brightz company in any way. I did not receive monetary compensation for this review from BB or anyone else. I did, however, receive this product for testing purposes at no cost to me.

Friday, February 5, 2010

new lighting product: my first review pending


I received my first item from a manufacturer for real-world product testing and review. Bike Brightz sent me a few samples (red, green, yellow, and blue) of their flashing LED lights to test out with the kids and on my commuter bike.


They are able to be zip-tied to the bicycle frame, such as the down tube or chain stays, and run off of two AAA batteries (included). The lights are activated by button and have a steady or a variety of flashing modes (generally varies by speed of the flashing). The affect appears to be similar to the Down Low Glow but for a lot less coin (BBz are about $20 + shipping). I am not certain whether the Bike Brightz offers the same level of lighting as the DLG, since I don't have any for side-by-side comparison. Plus, the installation is super easy and easy to transfer to a different bike, since re-usable zip ties are provided with the Bike Brightz kits. Note: I have not used the DTG lights but have only checked out other web pages about them.

I will post pics (day and night) from my kids' bikes and my commuter soon and give a fuller review after I have a few commutes (including some rain commute days to test for water resistance) with them installed.

Disclaimer: these products were provided to me from the Bike Brightz company for testing and review at no cost to me.

Thursday, December 24, 2009

Update re: Merry Christmas to Me!

I received my DiNotte light from Nashbar this week!

As you might have read previously, I ordered a helmet-mounted commuter light which includes a bright LED headlight and a mini flashing red LED in the rear (of the same "light engine" housing). The whole thing is about the size of a C cell battery, not including the 4 AA size rechargeable battery pack which is able to be tucked into a jersey pocket. An included velcro strap possibly is to allow for mounting the battery pack to the bike frame.

In the photo below, here's what came in the package (except the helmet): helmet mount, light and attached cord, straps, one set of 4 AA rechargeable batteries, a plug-in charger (I think it is of the "smart" variety), and the battery pack holder pouch, and two battery holders.


Here's a close-up photo of the light mounted to the helmet.


Here I am modeling the helmet and light.


I'll post my review of the product once I get a chance to ride with it a while.

Note: I am not sponsored by or any other way compensated by Nashbar or DiNotte or any other company for writing any of these blog posts.

Tuesday, December 15, 2009

Merry Christmas to me!

I bit the bullet - I ordered a DiNotte light (finally) after over a year of talking about doing it. I wasn't initially convinced that spending a lot of money (to me "a lot of money" = more than $50) on lights was worth it for the short bicycle commute I have and the few months out of the year it is dark during my commute to or from work or both. I noticed my speed has dropped a lot and I can only attribute it to my internal hesitance to ride faster than my lights can shine.

I found a really good deal at an online retailer that was offering a one-day sale of 25% off any orders over $100. I saved $15 even after adding shipping and taxes. (Now, I do generally stick with local bicycle shops for 99% of my cycling-related purchases, so I have some remorse about going this route).

I opted for the helmet-mounted 200L-AA-L. It features a front 200 Lumen light (equivalent to 15-20 watts Halogen) and a rear red flashing light within the same housing. A battery pack of four AA rechargeable batteries is stuffed into your jersey pocket or backpack. The batteries are not a proprietary style, so out on a trip, they can be replaced by virtually any rechargeable AA. I was hoping to find one that had a USB charger, but I admit I was pulled in by the sleek, small look of the DiNotte product.

As for the reason I selected the helmet style, I figured since I might be hopping from one bike to another (commuter bike to road bike) this is an easy way to switch rides without having to go through the hassle of transferring the lights over. Also, I like the ability to have the light sine where I am looking - at a pothole, at a pedestrian, motorist, etc.

Here is the light mounted... (stock DiNotte photo)


Here is a bicycle equipped with the DiNotte lights... (DiNotte stock photo)


Once the light gets here and I have a chance to test it out, I'll post my observations and recommendations.

Thursday, November 5, 2009

illumi-NATE!

I was reading a repost in the Seattle PI online edition (only edition) that discussed tactics for bicylists to improve their visibility. The article has a lot of good tips and photos accompanying it. You can also employ these on your kids' bikes, trikes, wagons, strollers, etc. to wheelchairs or walkers and also to your pets, or to your own attire or accessories as you're out walking in the seemingly prematurely arriving dark evening hours.

On my own, recently, I too beefed up my visibility on my commuter bike, a REI brand Novara Transfer (which you can read about here). The cool things about this bike is that it comes set-up for commuters - not only is there a color-matched rack and full fenders, it also includes a rear blinky light (integrated into the rear fender) and a front hub powered headlight. As I have found, however, this is just a rudimentary amount of lighting most commuters need. Essentially, it keeps you legal, but it doesn't give you a whole lot of visibility.

Initially, I augmented the rear blinky tail light with a red flasher I got for free courtesy of a community event hosted by WA State's Safe Routes to School Program. Soon after I added a cheapie ($6 at Fred Meyer) but very bright multi-LED flasher to it as well. So I had a built-in light, and two supplementals zip-tied to the rear rack.

Not content with just that alone, I added a flasher (by Planet Bike? Cateye?) to the back of my helmet, again with a zip-tie.

To augment the front headlight - especially important since the hub generator driven headlight does not stay on when you stop for a light or stop sign - I again went to a zip-tie solution and zip-tied a cheap 9 LED flashlight ($6 from Fred Meyer) to the stem.


About the same time as I was making these initial illumination enhancements, I found a wide-mouthed water bottle (a cool Austin music festival one) alongside a road heavily traveled by cyclists. I wasn't going to use it for drinking, but it made a perfect take-along emergency toolkit. It is just the right size for stuffing a patch kit, emergency ID, wrenches and other tools, etc. To fit with the illumination theme here, I added strips of red reflective tape to the sides for additional visibility.


The cool (recent) part - from a local sign shop (that makes highway signs) I received gratis pieces of the hyper-reflective material they use for road signs. This was stuff that would have ended up in the trash otherwise. I got yellow, hi-viz yellow, white/silver, and a clear red that itself isn't reflective, but it is when added over the white/silver. Below are shots of the materials under normal light and in the dark with the flash.


I trimmed strips to fit the front, back, and sides of the Transfer on the frame, fenders, fork, and rack.


And seat stays...


For the motion effect, I also added them to the crank and pedals (to the outside end of Shimano MTB SPDs) for the motion - I did the same with the wheels but have not yet decided if I like that look or not.


I also added the smaller scraps to my helmet.


As you can see from the photo, the combined effect really lights up the bike. No lights are turned on in any of these photos.

In the front view, the only added element is on the forks - the others are reflectors in the headlight or a traditional handlebar-mounted CPSC reflector.


In the rear, the stock red reflector is in the middle of the rack - everything else is from the reflective tape.

Sunday, November 2, 2008

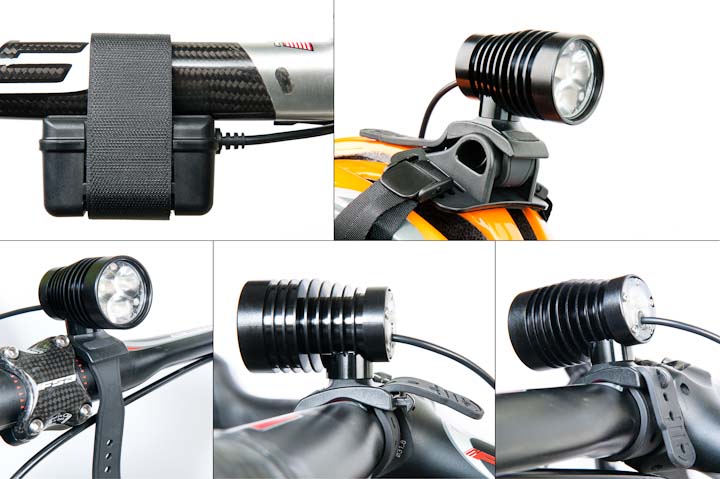
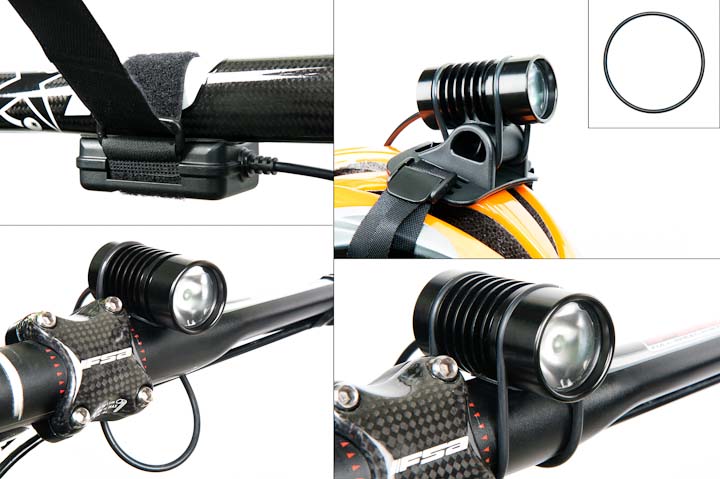
wish list item: DiNotte lights


If I found a wad of money in a trunk, I would spend some of it on better lights for bicycle commuting now that Daylight Savings Time is upon us.

DiNotte makes lights that seem (based on my viewing of a few product demos on YouTube) much brigter than you'd expect to get from such a s small package, and they take AA rechargable off-the-shelf batteries, not a specialized, expensive, cumbersome battery pack.

Of course, with his convenience and performance, the cost of the product is well north of the $100 range, which plants it in between most battery-powered head and tail lights and the higher end, higher powered, rechargeable units.


Photos are all from the DiNotte web site (http://www.dinottelighting.com/).

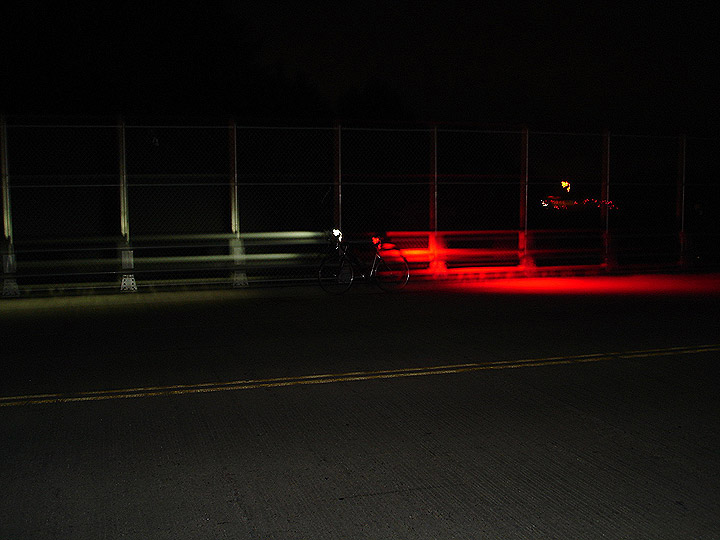
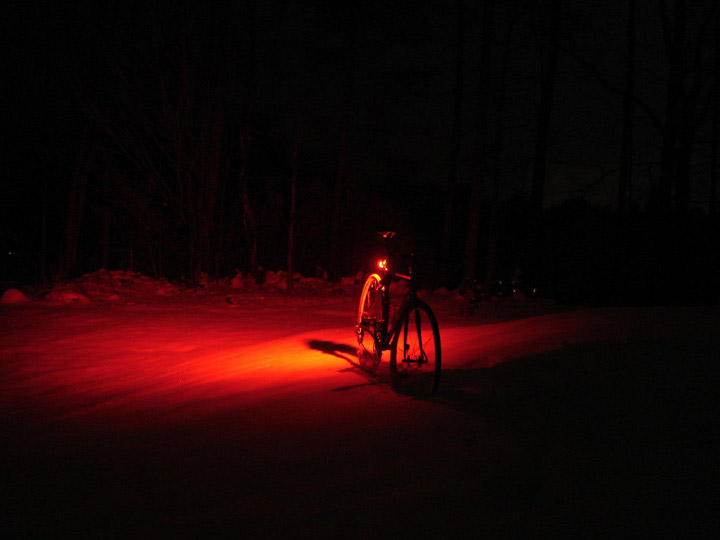
Here are videos posted to YouTube demonstrating the lights and their effectiveness.


Of course, if I had a set of these, the cost of the lights would be more than the cost of the bicycle!